When you purchase through links on our site, we may earn an affiliate commission. Here’s how it works.
There are plenty of pre-built gaming PCs on the market, but there’s nothing quite like the satisfaction of using one that you assembled yourself. While the process of assembling a computer isn’t difficult, it’s daunting the first time you do it. For those embarking on their first build – or perhaps the first build in several years – we’ve put together a step-by-step guide to building a PC.
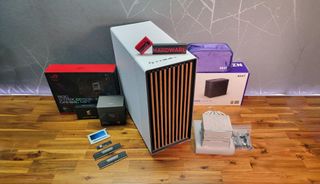
Before we start, know that this is a guide exclusively dedicated to assembly. That means you’ll need to pick out your parts first. Our list of tested and approved cases, CPUs, GPUs, motherboards, SSDs, power supplies and RAM can help you choose key components. Or you could check out our Best PC Builds page if you're looking to assemble a system at or under a specific price.
The other thing to keep in mind is that no two builds are identical. The order we’re going in here is based partly on preference and on the needs of our specific build. For instance, if you have a large aftermarket cooler that overhangs the RAM slots, you may need to install your memory first. Or if you're installing an AIO cooler radiator at the top of your case, you'll often need to plug in any power or fan cables up there before the cooler blocks access to the ports and headers.
Likewise, if you have a particularly small or cramped case and/or a huge high-end graphics card, you may need to install things in a slightly different order, since the graphics card will block access to many ports, slots and connectors.
In short, don't be surprised if you need to backtrack and pull out a part here or there to accommodate the quirks of your particular build. But don't get frustrated, as complications like this are common, even for people who have been regularly building PCs for decades.
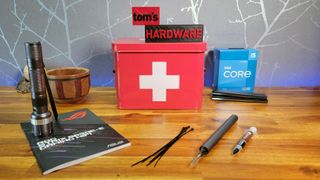
Before you start building a PC, you need to get your workspace ready. Make sure that you have all of your parts and tools at the ready. At the very least, you’ll want:
Some builders swear by anti-static mats or wrist straps. But as long as you don’t live in a particularly dry environment, you’re not building on a metal or all-plastic surface and you aren't rubbing your socks on a carpet while building, you should be able to avoid shorting out your PC or parts. Of course, there’s nothing wrong with playing things safe. So if you’re worried about static, take the appropriate precautions and tether yourself to an anti-static strap.
Get Tom's Hardware's best news and in-depth reviews, straight to your inbox.
By submitting your information you agree to the Terms & Conditions and Privacy Policy and are aged 16 or over.
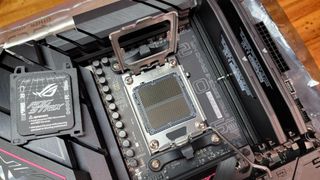
Some people prefer to mount the motherboard in the case before they do anything else, but it’s generally easier with most builds to connect key components like the CPU, M.2 storage and RAM without leaning over the side of the case.
Whether you’re going with an Intel- or AMD-based build, the first step is to remove the plastic cover protecting the socket, then release the tension lever on the CPU and (with the most recent AMD and Intel platforms) lift up the metal retaining bracket, so you can drop the processor into the CPU socket.
Note that all recent Intel motherboards, as well as AMD's latest AM5 platform, have the CPU-connecting pins built into the socket, while AMD’s AM4 and earlier platforms have the pins on the bottom of the CPU. For the purposes of this story, this is important mostly because it's a lot easier to damage an older AMD CPU by bending its pins. So if you're installing an AM4 (Ryzen 5000 or older) CPU, be extra careful about how you handle and install it.
Regardless of which platform you're building around, there will be an arrow/triangle on one corner of the top of the CPU. This needs to line up with the triangle on the socket or socket cover.
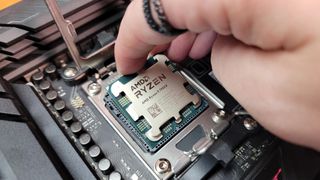
Don’t attempt to install a CPU with the arrow facing the wrong direction, or you could damage your chip, your board, or both! Once your CPU and socket are properly aligned, you can (gently) drop the chip in place, and it will settle into the socket under its own weight. If it doesn't, pick up the CPU and reseat it. Don't force the processor into the socket or you'll almost certainly damage something.
Once you've got the CPU settled correctly in the socket (check to see that it sits evenly, so that it isn't sticking up on any one side), drop the retaining bracket down over the edges of the processor, then press the tension lever back down.
Note that on Intel 12th and 13th Gen boards in particular, this may require a surprising amount of force, to the point that socket bending is a known issue, for those who often remove and reinstall processors in their motherboards. This shouldn't be a concern for a regular build where you install the CPU once or perhaps twice. Just know that you'll have to push the retention lever down pretty hard to get it to slip under its retention tab. So long as you've double-checked that your CPU is correctly seated before this, there's no cause for concern.
Note that the above instructions pertain to the mainstream platforms for AMD and Intel. Enthusiast platforms like Intel’s Xeon (or older Core X) and AMD’s Threadripper have different / more complex CPU installations, with the Intel chips involving two levers and Threadripper requiring Torx screws and a slide-in plastic bracket. Given the cost and added complexity, we would not recommend either of these for your first PC build.
Many processors come with coolers in the box. If you’re not doing any heavy overclocking, those may be good enough, though lots of builders also like to buy more powerful (and often quieter) aftermarket coolers, which may also be more visually appealing.
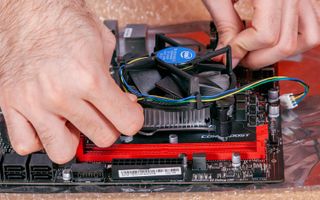
If you decide to use the stock cooler, you'll find that it already has thermal paste applied, as do many AIOs and aftermarket coolers.

Regardless of whether there is pre-applied paste on your cooler or not, don't forget to peel the protective film off the cold plate / paste area before installing the cooler. If you skip this step, you'll have to tear half of your system apart later when you realize your CPU temperatures are abnormally high.
While pre-applied thermal paste is increasingly common, you’ll still often need to apply your own thermal paste atop the CPU. The tube that comes with your cooler will work well enough, but if you want even lower temperatures, consider checking out our list of the best thermal paste we've tested.